How to install Windows 11 from USB
![]() Hello, friend! Do you need a new fresh Windows 11 on your PC? Your old Windows works bad and you want to install or reinstall Windows 11? I think, you`ve found what you need! On this special page you will find all information to do this. Find answers to your questions or just act step by step according to the guide and you will get goodworking and optimized Windows 11 (you can apply this guide to Windows 10 also).
Hello, friend! Do you need a new fresh Windows 11 on your PC? Your old Windows works bad and you want to install or reinstall Windows 11? I think, you`ve found what you need! On this special page you will find all information to do this. Find answers to your questions or just act step by step according to the guide and you will get goodworking and optimized Windows 11 (you can apply this guide to Windows 10 also).
This guide is full. But while you see this line, it will be updated with some useful detailes.
- How to download Windows 11 ISO from official website
- How to delete Windows.old folder in Windows 11?
- How to burn Windows 11 ISO on a flash drive
- How to install Windows 11 without usb flash drive (for Advance user)
- How to Activate Windows 11
- SSD error "A MEDIA DRIVER YOUR COMPUTER NEEDS IS MISSING"
Step 1. Download Windows 11 ISO (disc image)
I recommend you to download Windows from the official Microsoft website (click here).
There you will see 3 ways to download Windows 11 iso and 3 types of links.
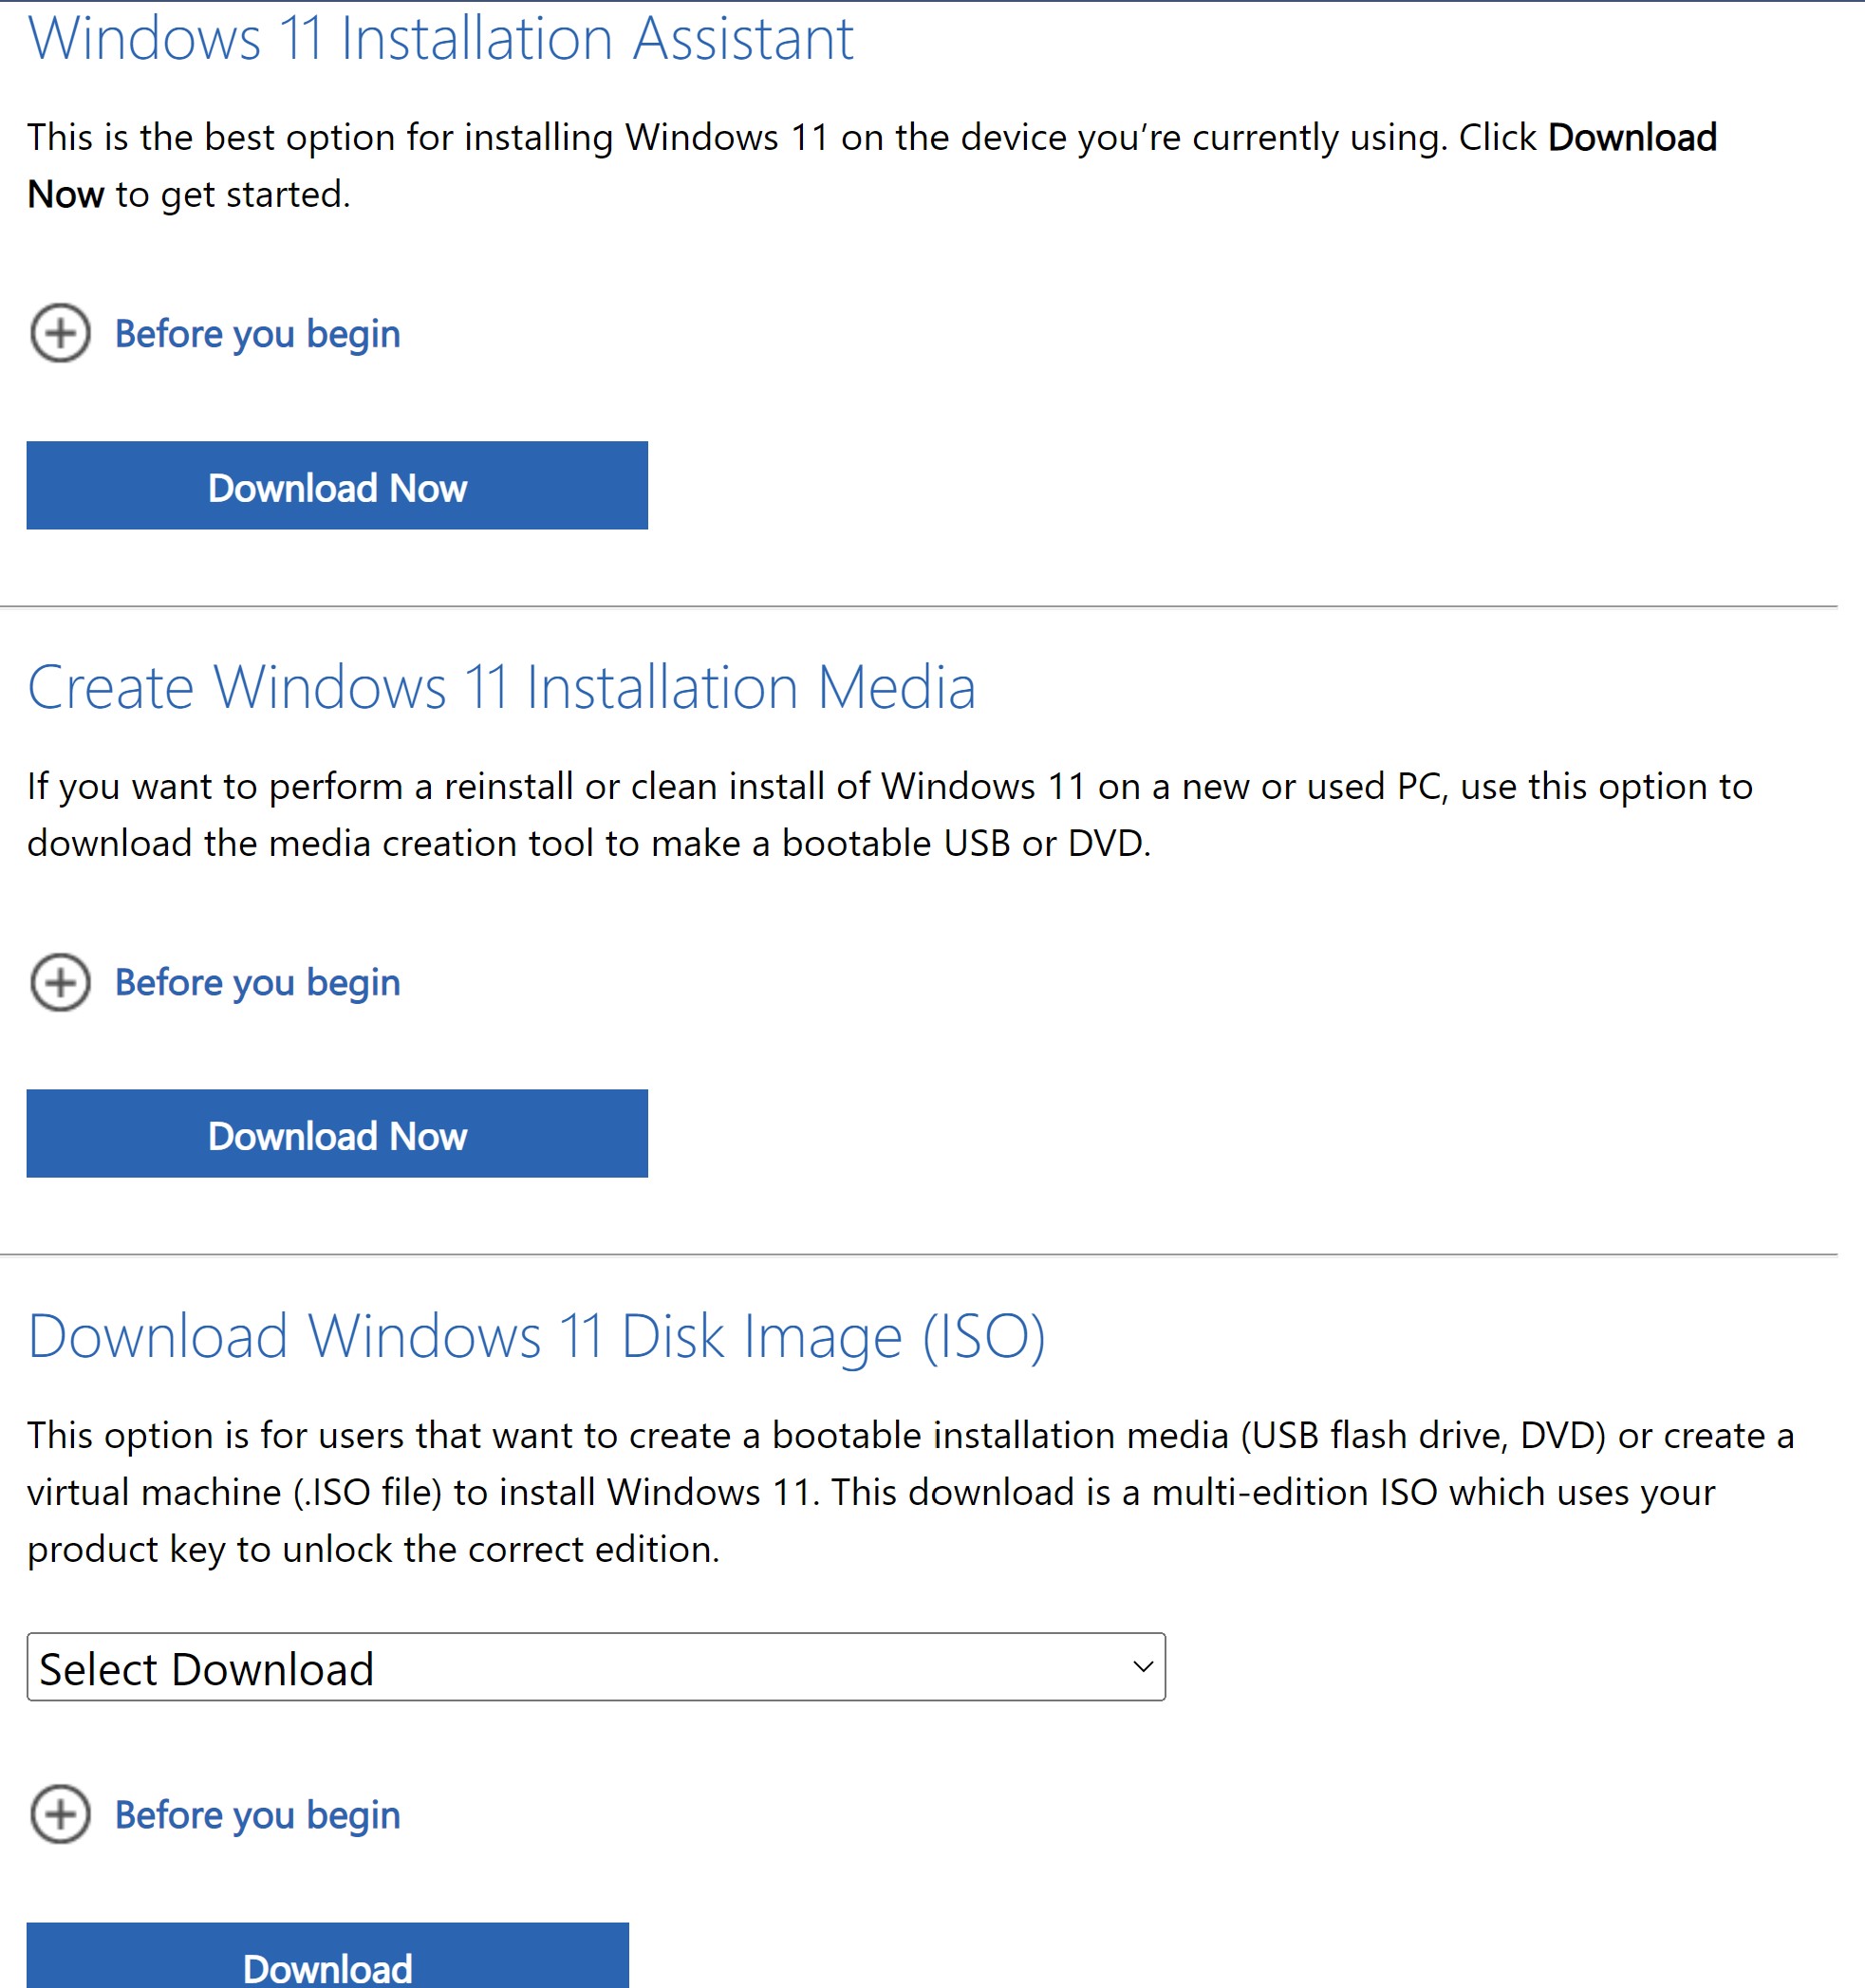
All three can be used, but it is best to do a clean installation. To do this, it is more convenient for me to use either the second or third method.
The first method - Installation assistant - is good when you need to update the system while saving all information. This is the same if you decide just upgrade your PC through Windows update service.
Read here: How to upgrade Windows 10 to Windows 11 without losing data, programs, settings.
I do not like this way because with an old data old glitches and errors would be also saved.
Don't worry, the clean Windows 11 installation will keep all your files safe and sound as well.
I advise you the second way (Create Windows 11 Installation Media) if you are novice user, and also if your computer supports Windows 11 (if it is 3-4 years old or less, then it definitely supports it. Let`s remind what the minimum requirements.
What is the minimum requirements to install Windows 11?
- Processor – 2 or more cores, 64-bit processor
- RAM – 4 gigabyte (GB)
- Storage – 64 GB of space
- Motherboard - UEFI, Secure Boot
- TPM – Trusted Platform Module (TPM) version 2.0
- Graphics Card – Compatible with DirectX 12 or later with WDDM 2.0 driver Display, High definition (720p) display
- Internet (you need to have it during installation)
If your computer does`t have something, for example, TPM 2.0 you will find an option in the begining of this page.
How to make Windows 11 bootable flash drive with Media creation tool?
- Press the download button. Download and run special program:
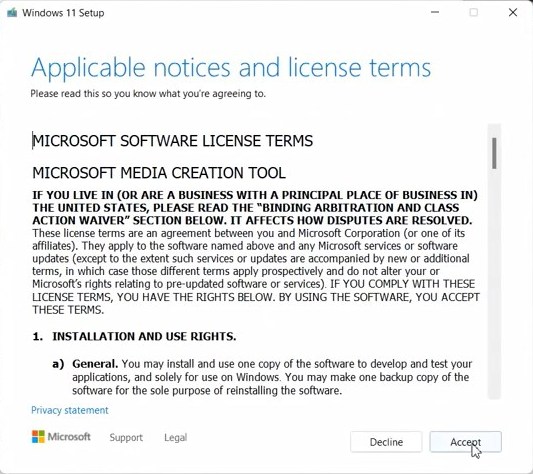
- Click Accept if you agree with the license agreement.
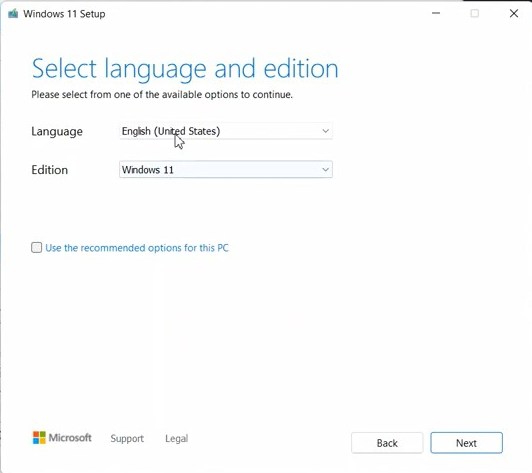
- Select the language and edition. If you have a license for some special edition if will appear when you activate Windows 11.
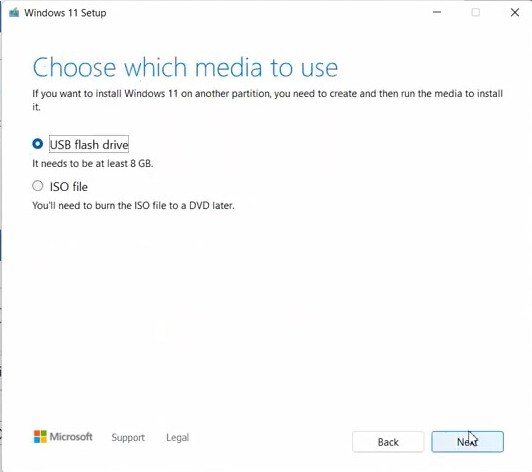
- Select the creation of a USB flash drive, insert it of course (it should be 8Gb at least), and on the next page select a USB flash drive for recording.
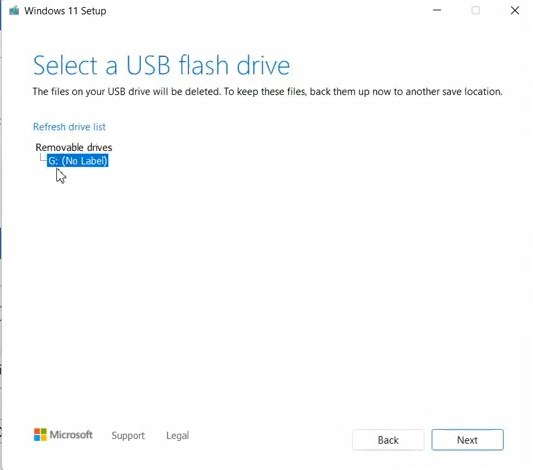
That`s all! The process will take a lot of time (Windows should download - this is about 5 GB - and then it will be burning to a USB flash drive). As a result, you will have a ready-made bootable Windows 11 flash drive. You can proceed to the next step. But before that, I will show you another option.
How to burn Windows 11 iso to usb flash drive?
This way to make Windows 11 usb is for more advanced users. 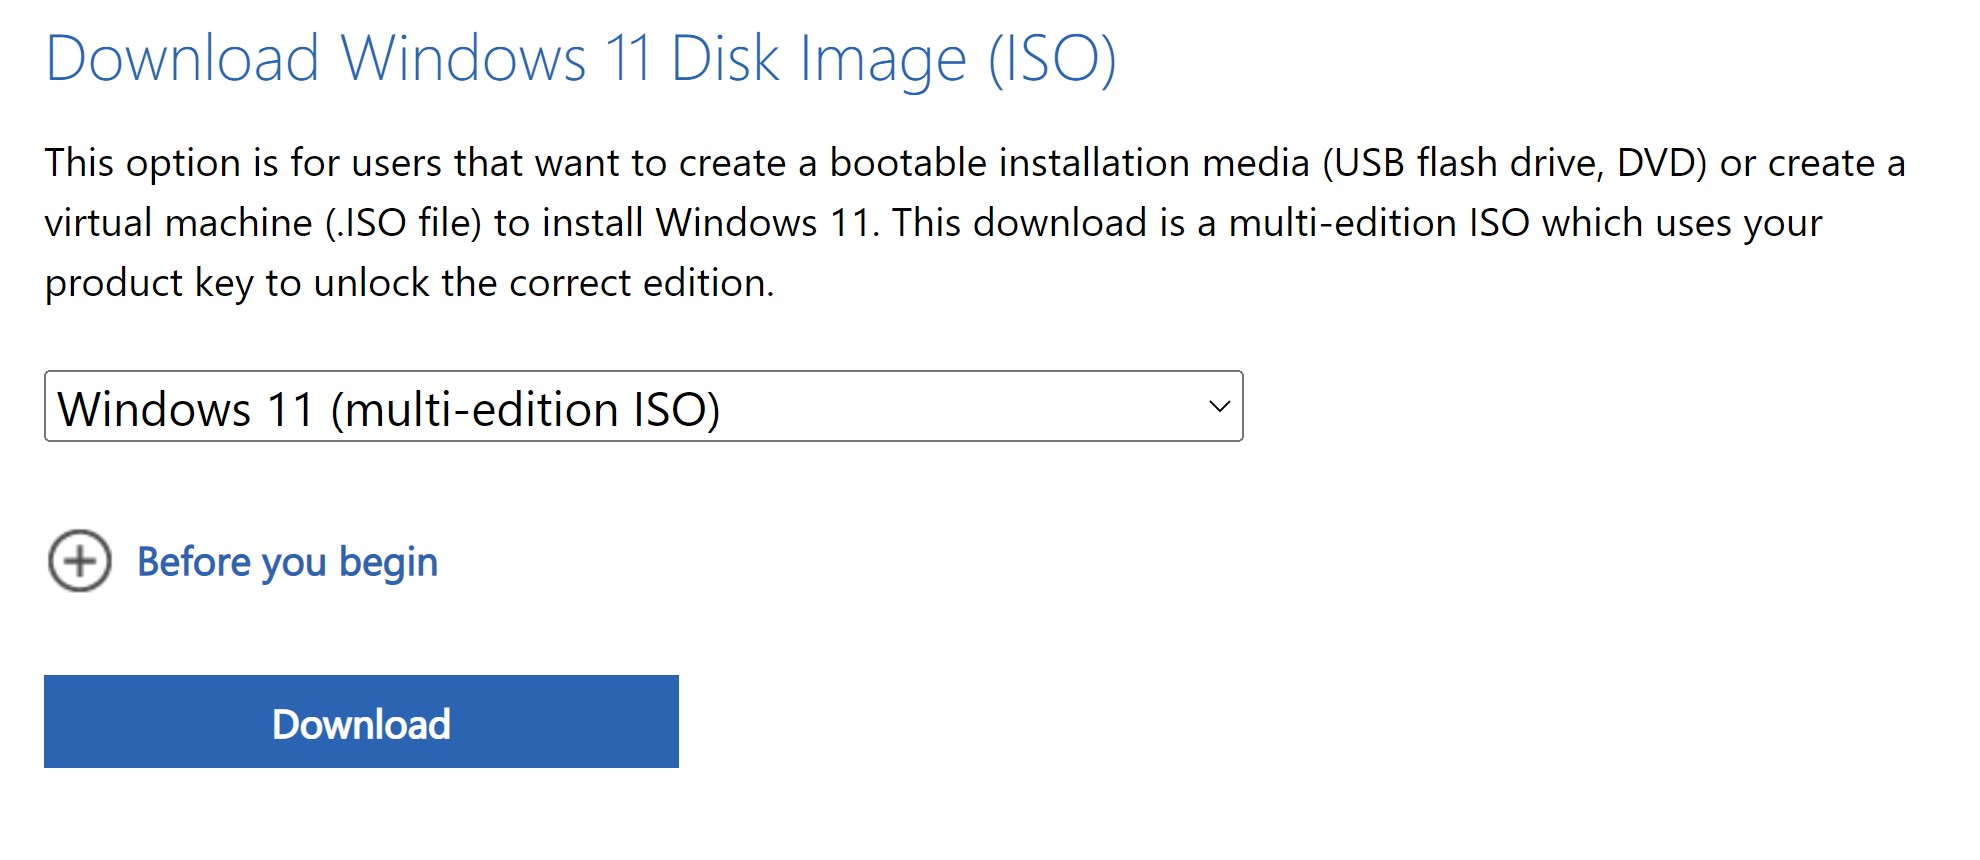
- On this page select Windows 11 multi-edition and click download.
- Choose a language and confirm.
- Then click on the 64bit download button and the Windows 11 image file in ISO format starts downloading.
- While it is downloading find program that will burn it to a USB flash drive. I like these:
Rufus - https://rufus.ie/en/
UltraIso - https://www.ultraiso.com/download.html - Use one of this programs to burn iso image. Read the instruction and watch videos here:
How to make Windows 11 bootable flash drive?
The image will be transferred to the USB flash drive in such a way that you can then start from it in step 3. By the way, while Windows is downloading or recording, you can not waste time and follow the second step.
Step 2. Prepare PC and save a data
What does it include?
First, let`s discuss a situation when you need to reinstall Windows from scratch. Therefore during the clean install process, the main partition of your disk, drive C, will be erased along with the old system. And our task is to transfer from drive C to another partition or to some kind of removable drive - a flash drive, an external drive, a phone - all the files that we need.
Please note that the drive C contains desktop, folders: documents, images, videos, downloads. If you use them, save everything you need from them to another drive. Programs such as Office or Photoshop cannot be saved in any way, they will need to be reinstalled in a new Windows. The only thing is, if you have the installation files of these programs, for example, in downloads folder, copy them to another disk and do not to download them again.
Next, we need to prepare the BIOS so that the computer boots from the USB flash drive when it is turned on. To do this, turn off the computer completely, insert the flash drive and boot from it. Windows 11 installation may starts automatically.

But if you have a problem with it try this:
- - To shutdown PC completely push the powerbutton of your PC more than 6 sec.
- - Another option to shutdown Windows 11 completely is to press SHIFT button and don`t let go. At the same time click on start menu and find shudown button.
- - To boot from USB you may need to run boot menu of your BIOS UEFI or setup boot priorities in BIOS.
When we turn PC on again quickly and many times press the Boot menu or BIOS entry key - usually it is F2, F12, ESC, F8 or DEL.
Just in case, I have compiled Bios entry key table for you from different manufacturers, because it happens differently in different BIOSes. Our task in the BIOS is to find the BUT section, boot priorities or something like that. Boot means to boot from something. In the first place you need to put a USB flash drive, then when you start the computer, it will be loaded from it. At the end, you need to save the settings with the save and exit button, and confirm. There is also a boot menu at the bottom and here, without changing the settings, you can boot from a USB flash drive once.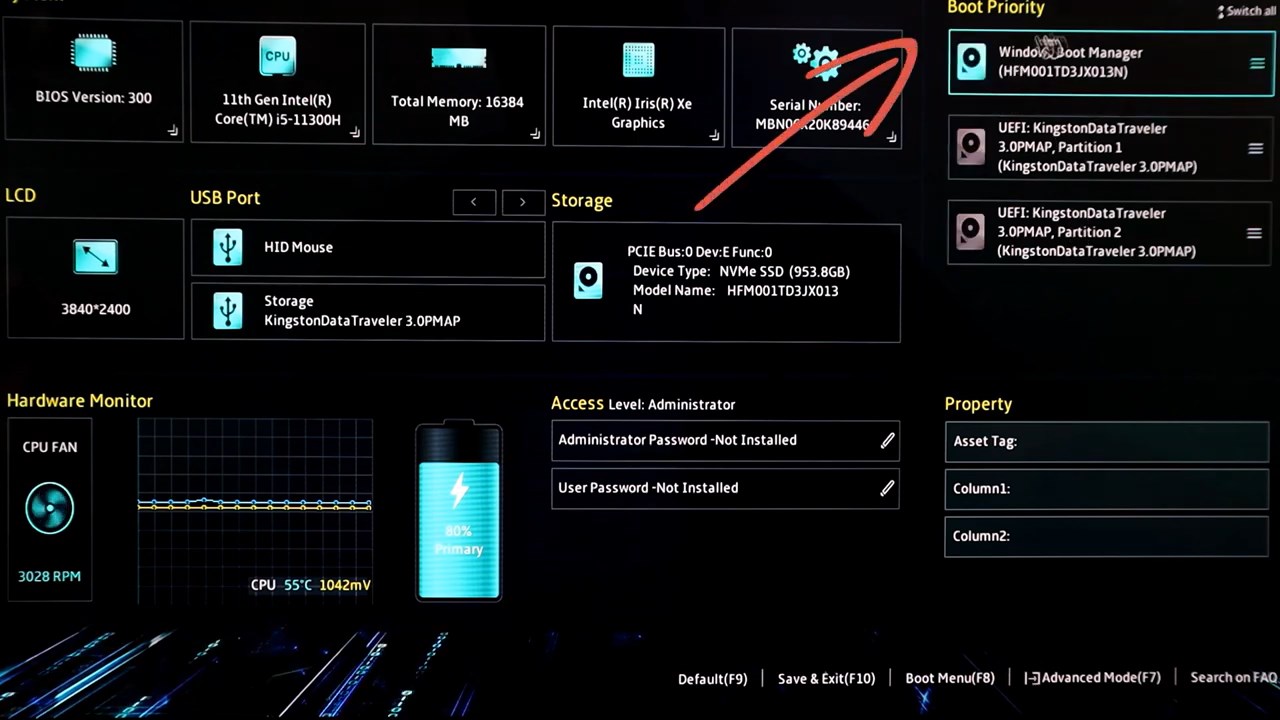
- - Another convenient key is the boot menu - it launches a menu in which you can choose to boot from a USB flash drive.
Watch also how to solve most popular problems with booting from a usb flash drive:
Step 3. Install Windows 11 on drive C
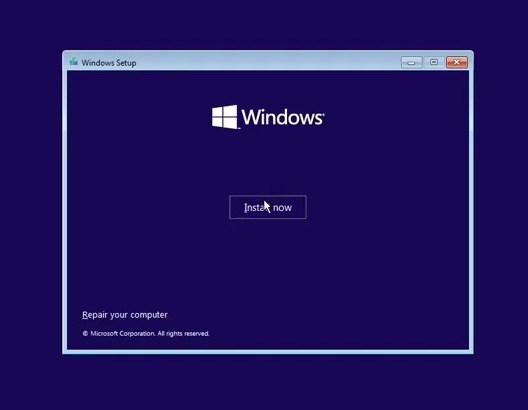
In the first window, click Next, then click "install now".
Windows activation.
We are asked for a license key, a code of letters and numbers that makes the system complete and legally usable. If you already have this code, or the code from Windows 10, maybe even from Windows 8, it may work. If you have a new computer, then the code from another computer will not work. But if you reinstall Windows, then it will. And even if you don't know it, you can choose - "I don't have a product key"
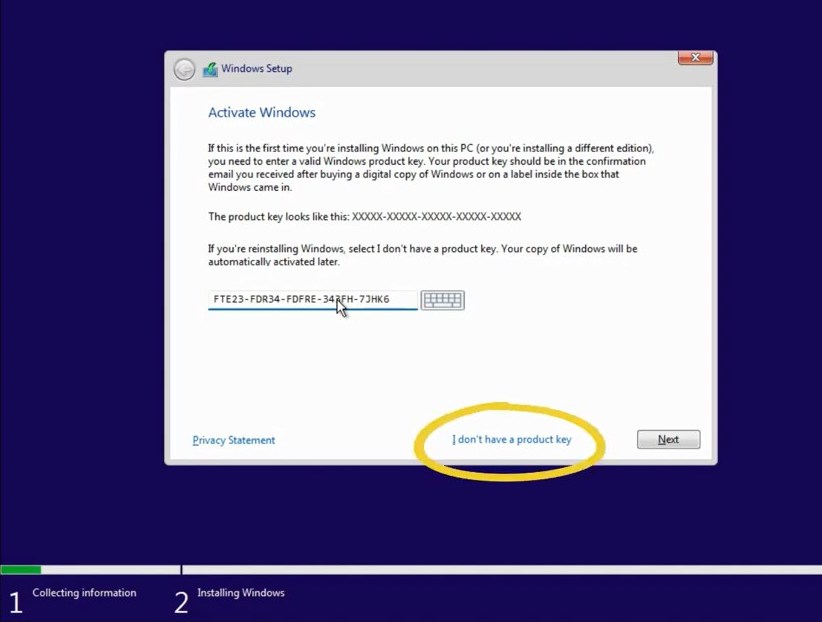
Log into the Microsoft account and the code will pull itself up from there, and the system will be activated. If you did not have a licensed Windows, you want to have it, but you think that it is too expensive, visit the ulap.top website - there are great offers for digital licenses - they are cheaper than in the store, while also activating Windows and linking to your account forever.
Can I click that there is no code and use the system without it? It is possible, but it will constantly remind you that it is not activated, this is not very comfortable, but for some it is also an option. The lack of code does not affect the performance. Well, let's skip this step for now, choose "I don`t have a product key".
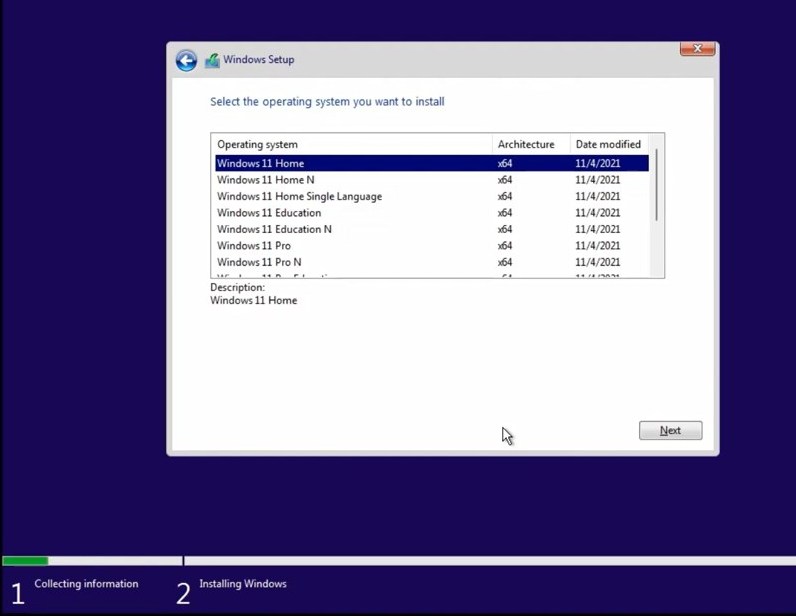
Select the release of Windows 11. If you already have a key for a certain variation, then you should select it. For example, if you purchased a key for the home version, the pro version is not activated and vice versa does not work either. If you still don’t know what to choose, use Windows 11 Home. It is easier for PC resources, but for modern computers this is not essential, so you can safely take a pro version and don’t worry.
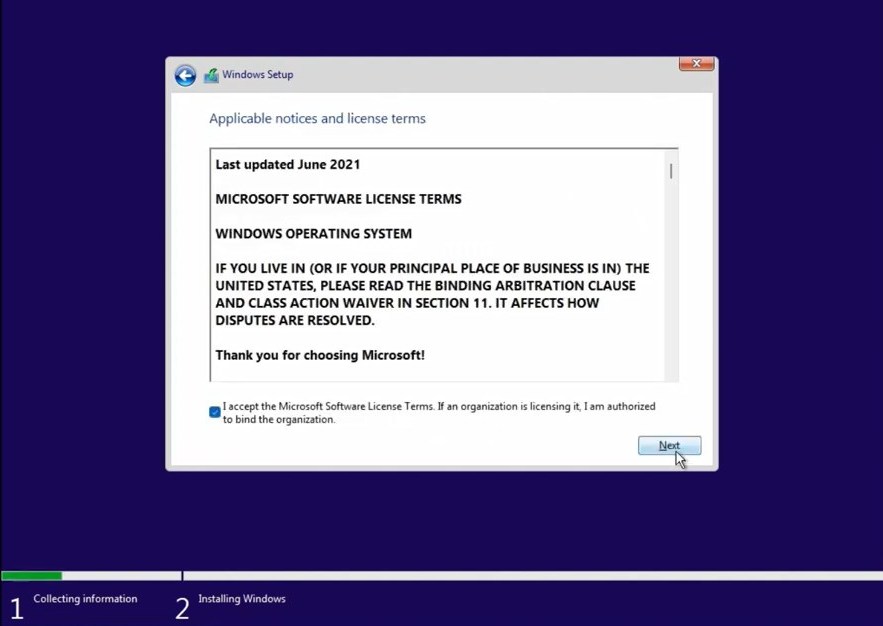
Agree with the updated license. Put a tick and click next.
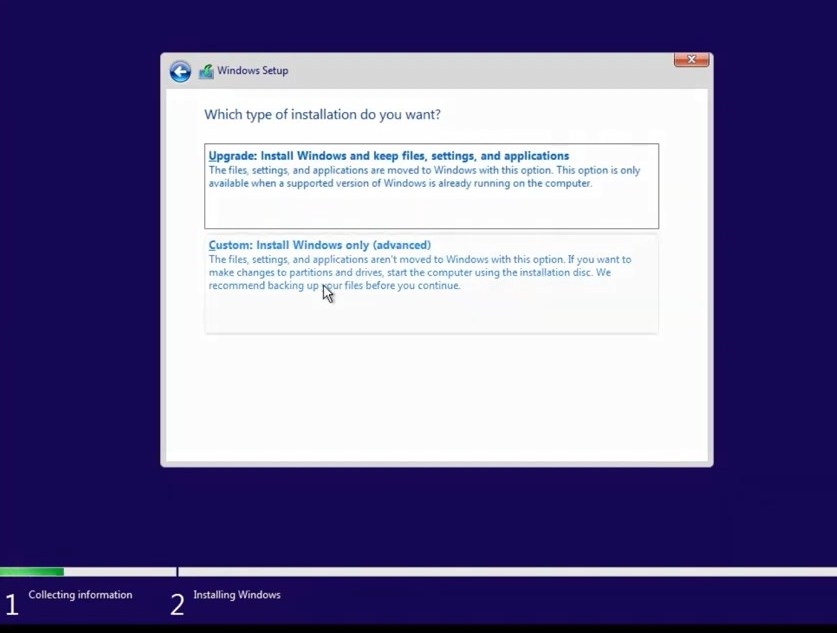
Here we need to choose a custom installation, because we are doing a clean installation, not an update.
Here is a very important step. Be careful. We need to choose where to install Windows.
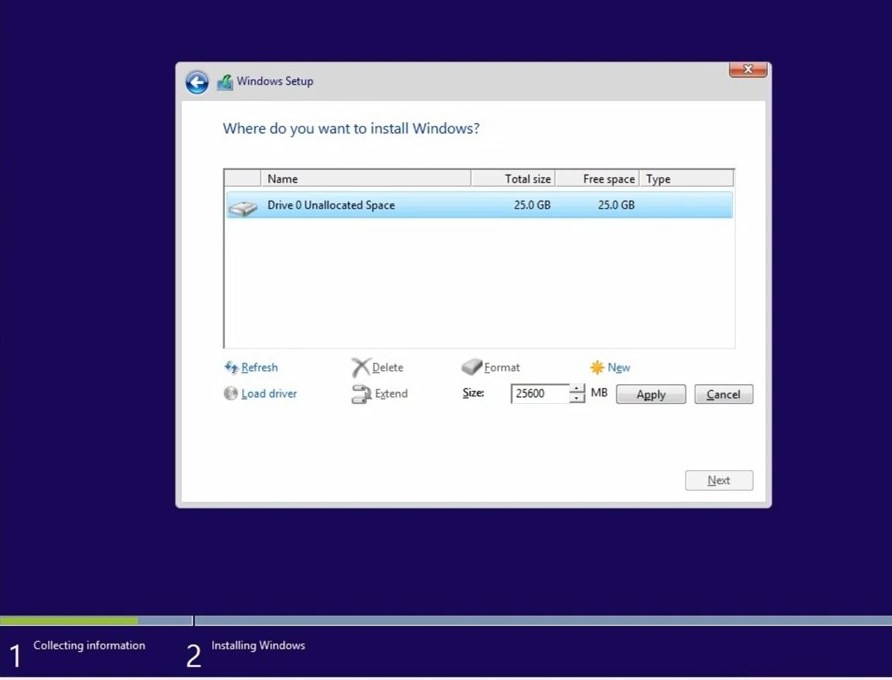
On the picture you see a screenshot from virtual machine, so here is a 60 GB disk, it is now completely empty, like new, you will have 250, 500, 1000 GB, and maybe several disks.
If you have a new computer and there is an error "A media driver your computer needs is missing", read here how to solve it.
So let's look at 2 different situations:
1. How to install Windows 11 on empty disk
You have a new PC and a completely new hard drive or ssd in it. It has no partitions for storing information like on the picture.
- Press the NEW button and set the size of main partition on which Windows will be - this will be your C drive. Set at least 100 GB or 100,000 MB, and more. I specify 25600 just for an example. Click apply and Ok to create additional sections. 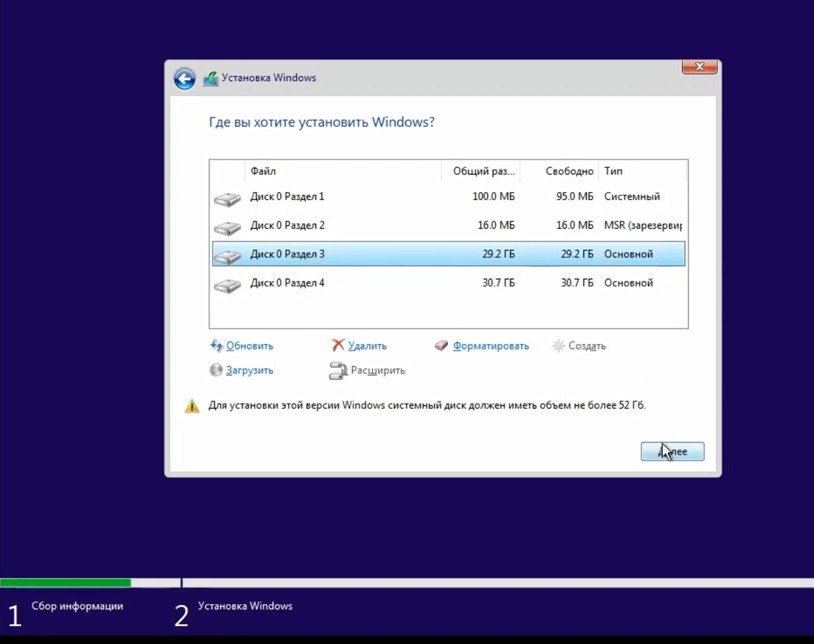
As you can see, 2 more system partitions have been added, they are small (100 Mb and 16 Mb) and in the future they will be invisible to you. The third line is our main partition, where we will install Windows. And there is unallocated space left - here you can add drive D, E, etc. distributing the place as you like.
- Select the main partition (№3) and click Next. Windows begins its installation in the permanent memory of the computer.
Read here what to do If Windows doesn`t detect your hard drive or SSD.
2. How to reinstall Windows 11
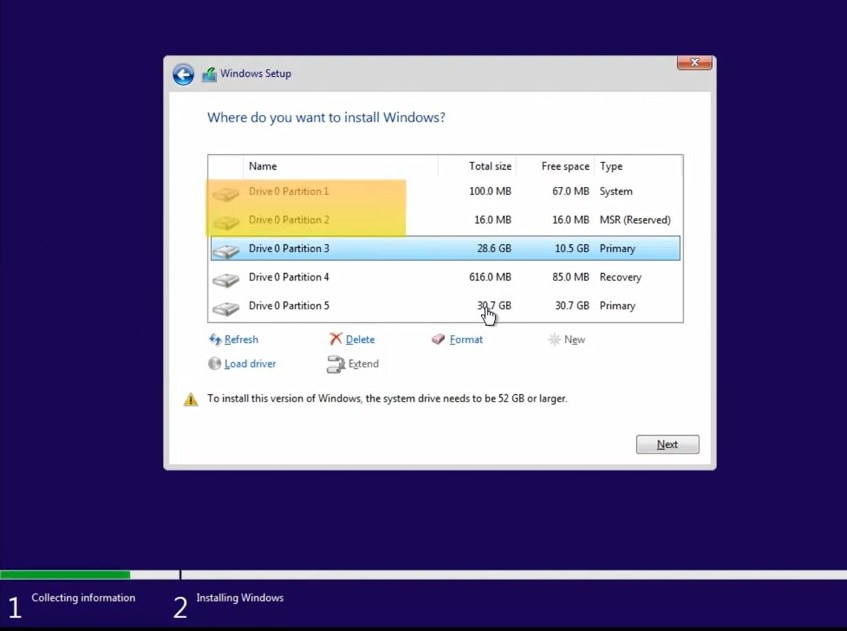
Now the situation is different. We already have several partitions, some have important files that we really don’t want to erase.
- By the total size and the remaining free space, calculate which partition is drive C.
- Click Format to erase the old system.
- Select this empty section and click next.
That's it, after that you need to wait for some time while the files are being copied. At the end, the computer will reboot - somewhere at this time - get the USB flash drive out of it. Or correct the BIOS settings back if you changed them. The computer will prepare various services and restart again.
Step 4. Basic setup
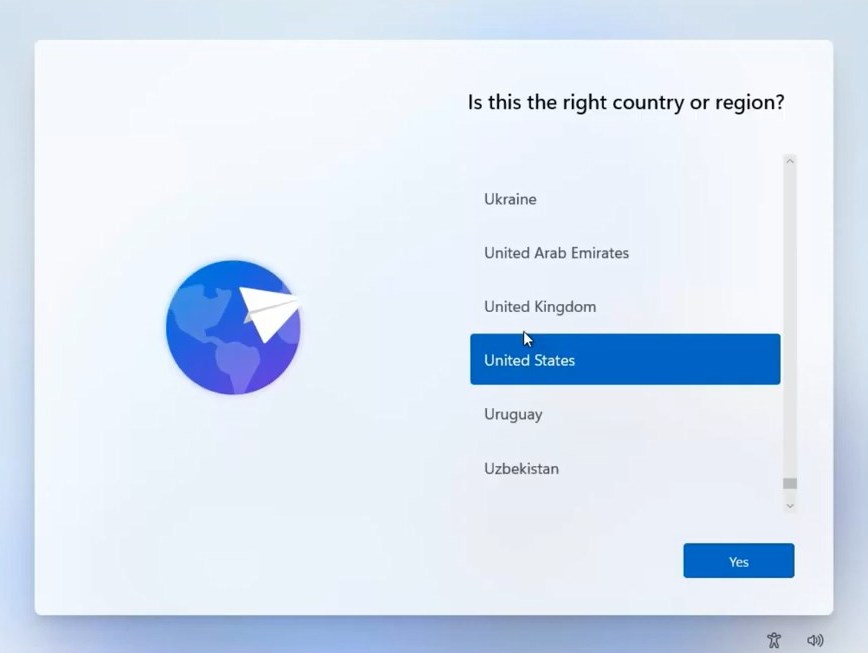
- Select the region, the main keyboard layout (English by default). You can add more languages.
- Internet updates are checked. If you have a direct connection, the program did not ask anything. But you may be asked to connect to the Internet - Wi-Fi name and password. At this step, it is better to have the Internet, only with it everything can be done well. After checking for updates, some of them will be installed, you need to wait.
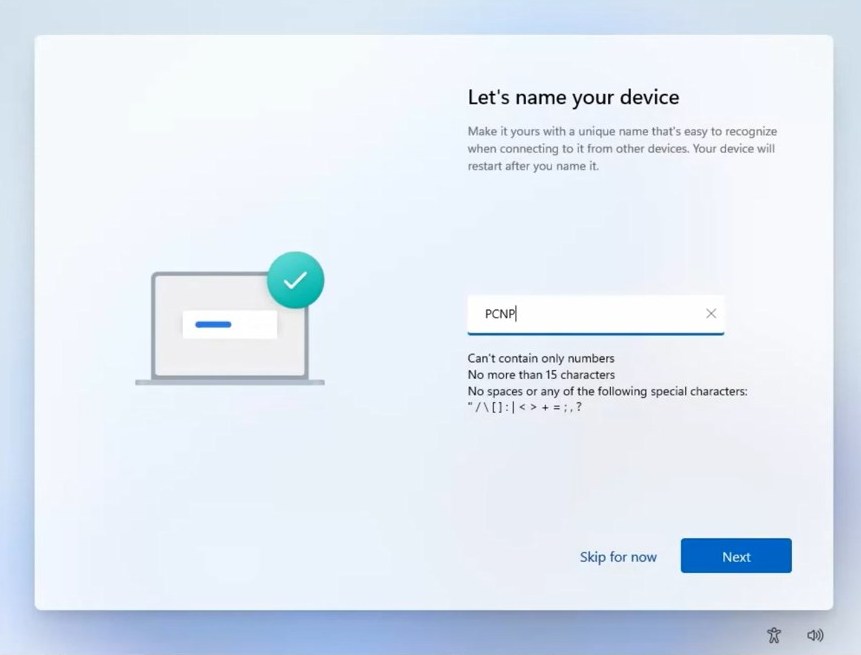
- Choose a name for your PC, although you can skip this.
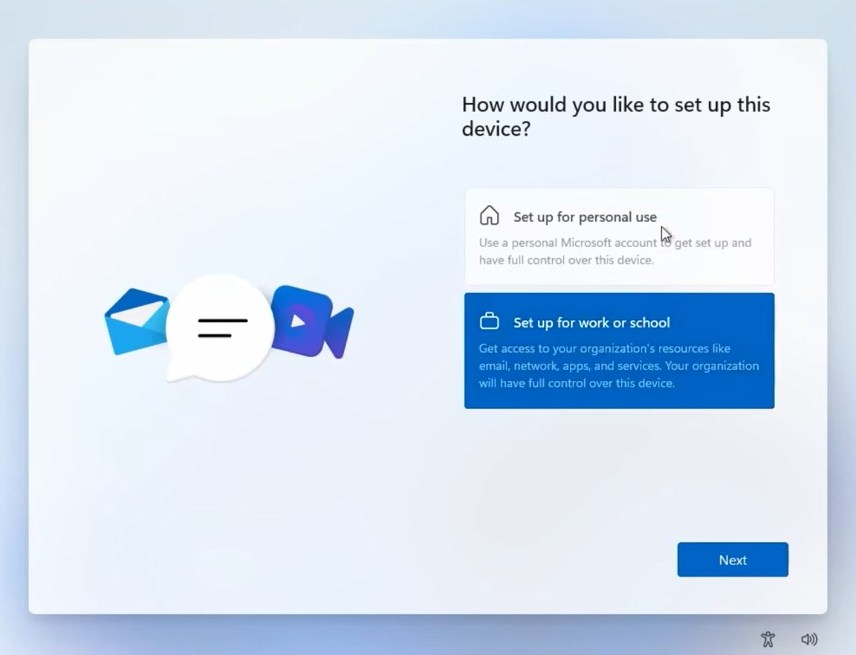
- The next window - select - this is a personal home computer or a work one. This choice affects which type of account you use. Select the first if it is your personal PC.
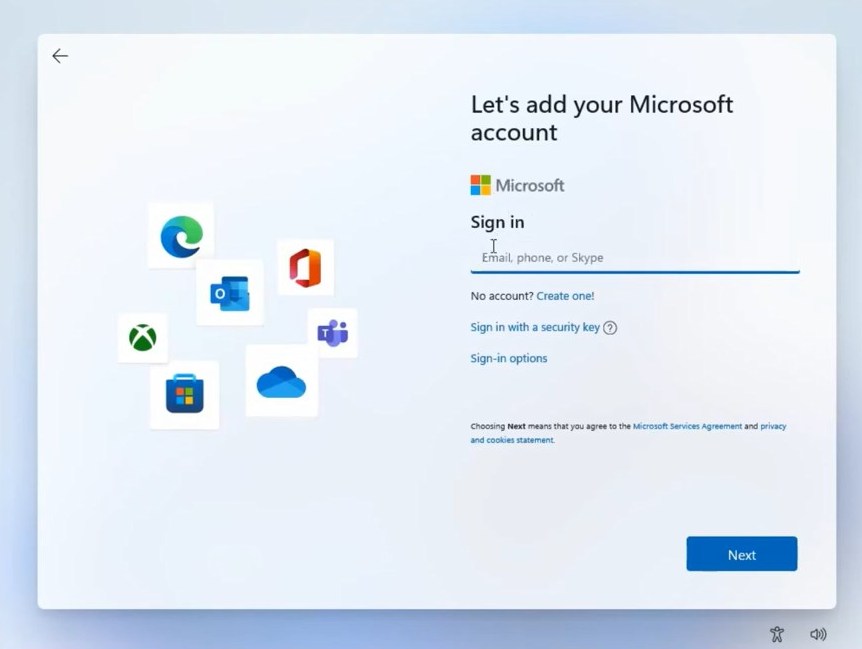
- That's why we need the Internet - you need to sign in with your Microsoft account. It includes an email and login password. If you don't remember or don't have it, you can create one - click Create one.
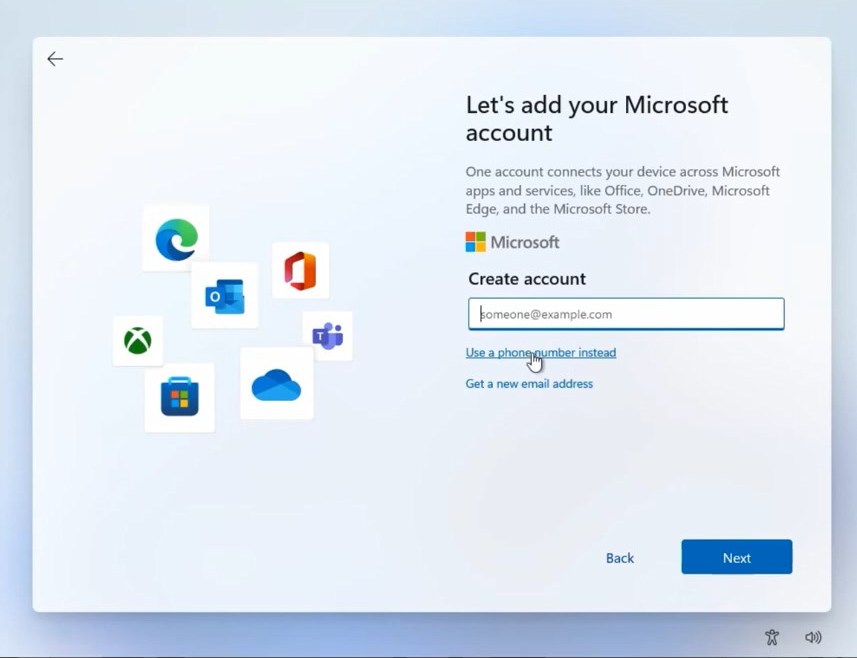
- Input your working email, there is also an option to register by phone number or receive a new email from Microsoft. On the next page input new password, then fill out a short questionnaire about yourself. Create a PIN code for comfort.
READ ALSO:
How to create a Local account Windows 11 without a Microsoft account?
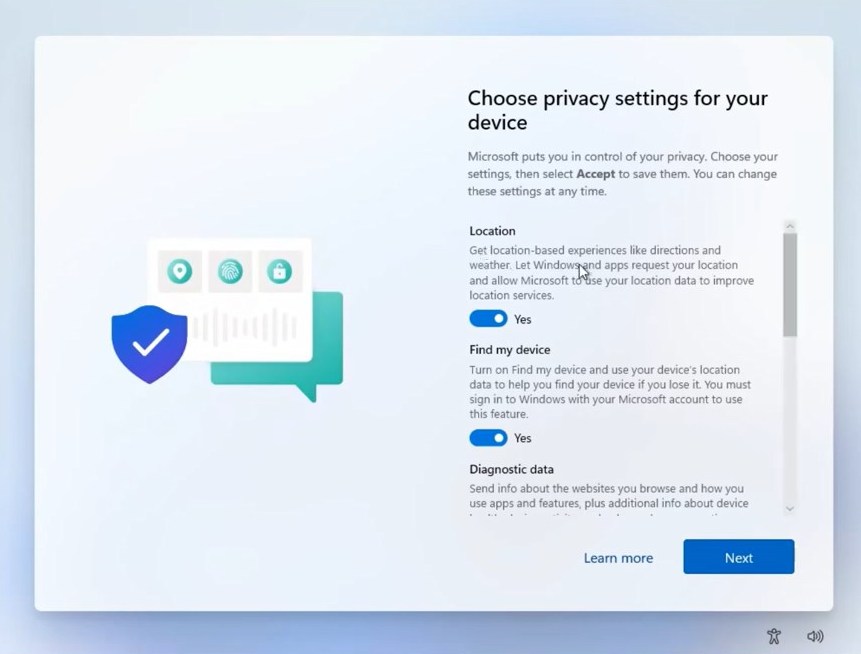
- On this page I turn off all services that somehow track my actions, collect statistics and send it to Microsoft. If you want, leave it, but in my opinion this is an unnecessary use of both computer resources and the Internet. You can read for yourself what is for what and turn off the unnecessary. But everything - is better.
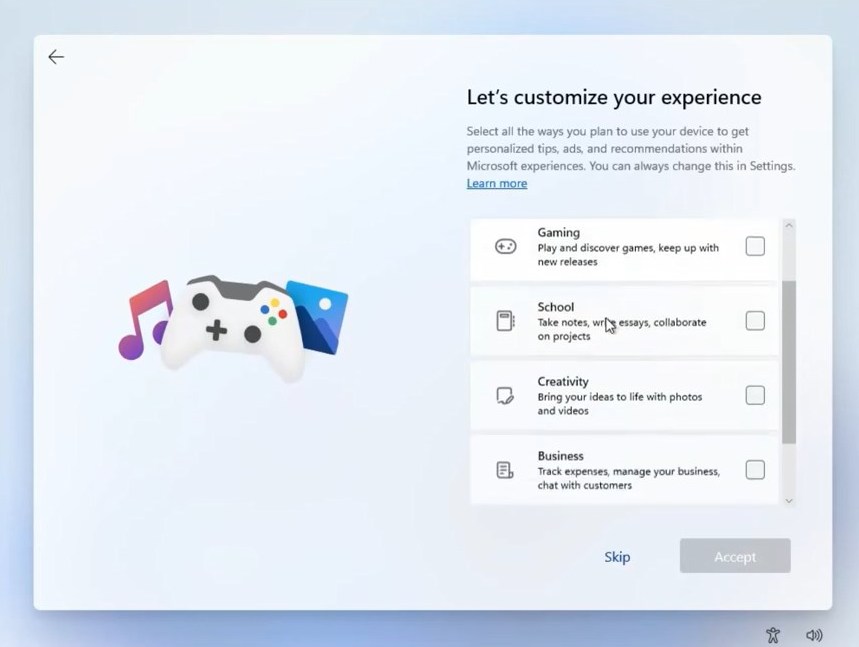
- Here, if you know what programs you need, do not choose anything, skip. Based on this choice, Microsoft will add standard programs and various ads to your start menu.
- The final stage of updates and installations will start. And here it is...
- Often the screen resolution is not correct. Press RMB on the desktop, select the screen settings, find the resolution and select the recommended or desired one.

- In the start menu, I immediately delete programs and links that I don’t need. RMB - delete.
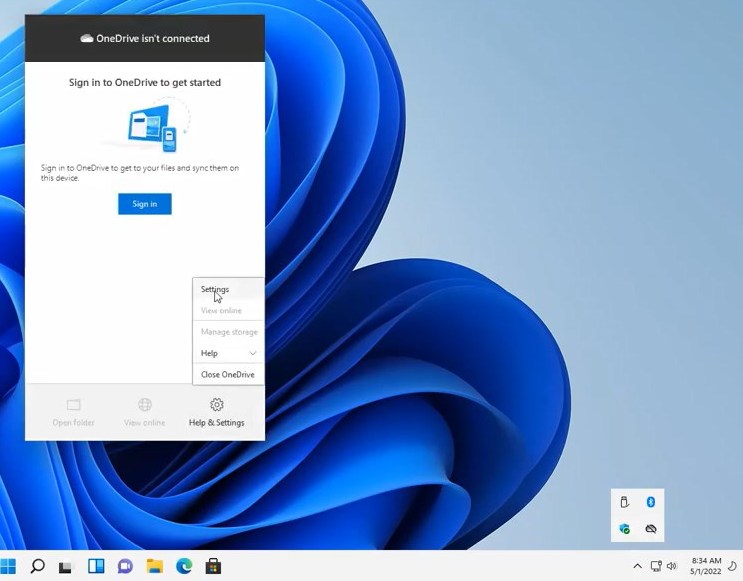
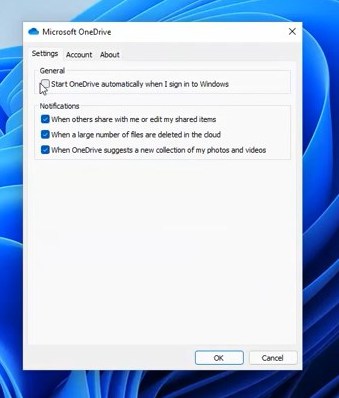
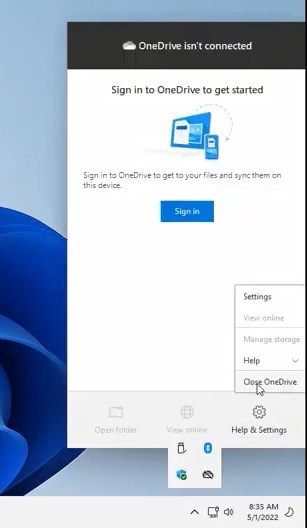
- If you do not use the cloud drive, turn it off - click on its icon in the icon bar near the clock (RMB), select Settings. Tab Options - uncheck the automatic start. Then click again and close.
- What else I advise you to do after installation is to go to the Settings - Windows Update center and download, install all the latest updates - various bugs and shortcomings that are still in the new Windows 11 will be fixed there. It will take time, but it needs to be done.
And, of course, the logical conclusion of the Windows installation is activation.
How to Activate Windows 11
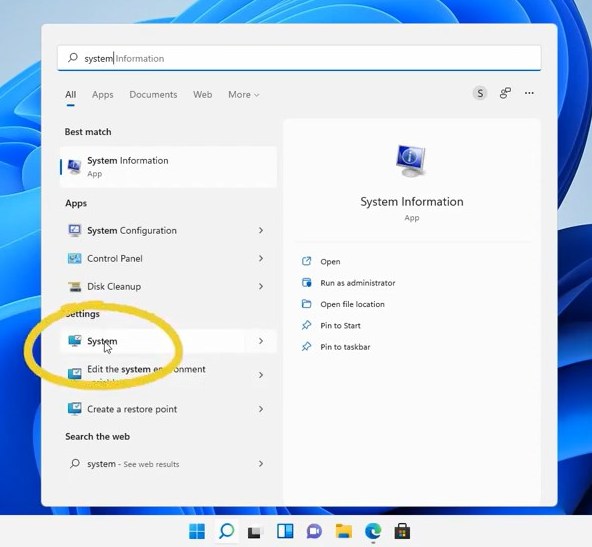
1) Open Start or search menu and write system - select the system section from the control panel.
2) Scroll down to find the Product Key and Activation.
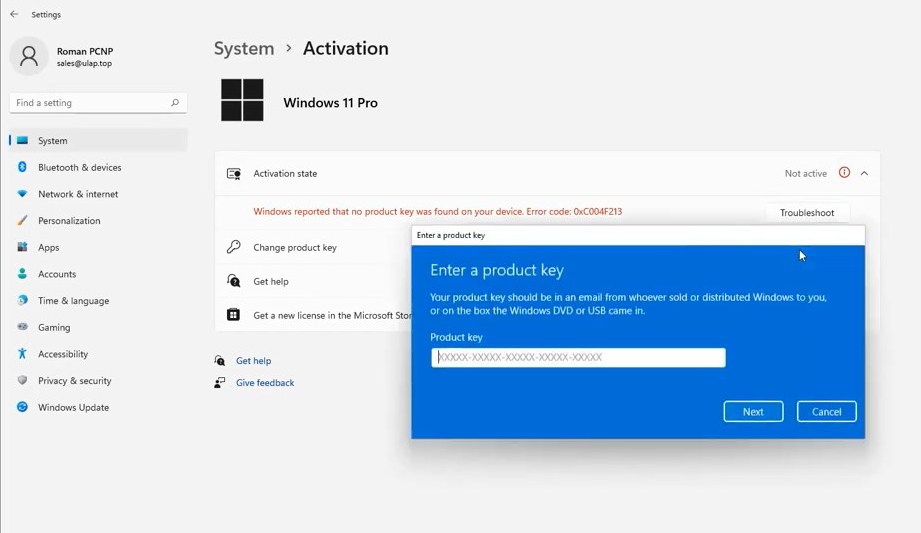
3) Click - activate via the Internet. If you purchased a key on the ulap.top/eng-lic website - select change key - input a new one, click NEXT, follow the prompts and your Windows will be activated.
Step 5. Drivers and programs
Drivers are special programs that connect computer with peripheral devices - video cards, sound card, bluetooth, Wi-Fi, etc.
- Click RMB on the start menu icon and select Device Manager.
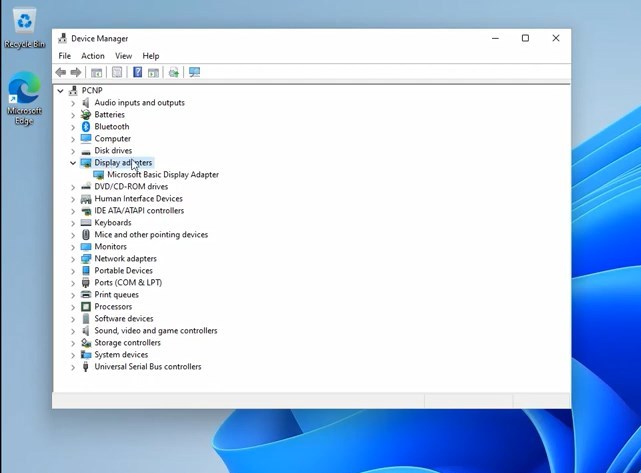
- Here you will see a list and if some device does not work or is not recognized, it lacks a driver. For some devices it is very important to install the original driver from the manufacturer's website, especially for the video card. On the picture you see there is a basic driver here, and it must be Nvidia to extract all the power from the video card.
- Also it is very important to install correct driver for the sound card.
- To search it, go to the browser. And in a search engine, for example, google.com, write "download drivers for..." and a laptop model. If you have a desktop PC, then models of its individual parts: the motherboard, video card. In the list look for the official website of the manufacturer - this is the safest option. On official website you will find different drivers available for download
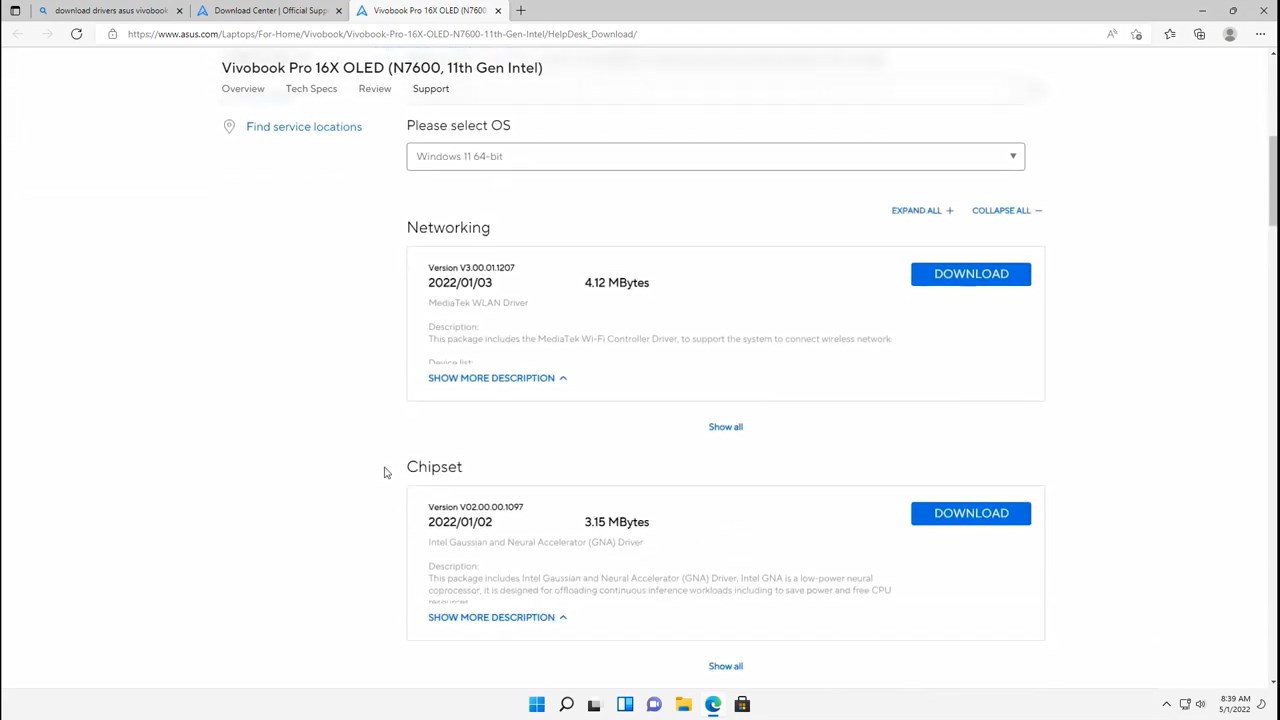
- it's best to download and install all of them, including updating the BIOS.
Step 6. Customizing and optimization
And finally we come to the 6th step. It is not mandatory, but if you want to improve your computer performance a little more, as well as improve your skills, read about it in this category.
Also write in the comments what you found useful in this instruction, what is missing. If your comment will be useful, I will add it to instruction. Thank you!
And here is a video guide:
Comments